It’s become an all-too-common refrain in non-loot-shooter FPS games: The stats lie. In SGW Contracts 2, it’s moreso a lie of omission, but a lie none-the-less that can cost you valuable time when attempting to complete challenges to finish a mission perfectly.
First, let’s talk about ballistics in SGW Contracts 2.
How rifle ballistics work in SGW Contracts 2
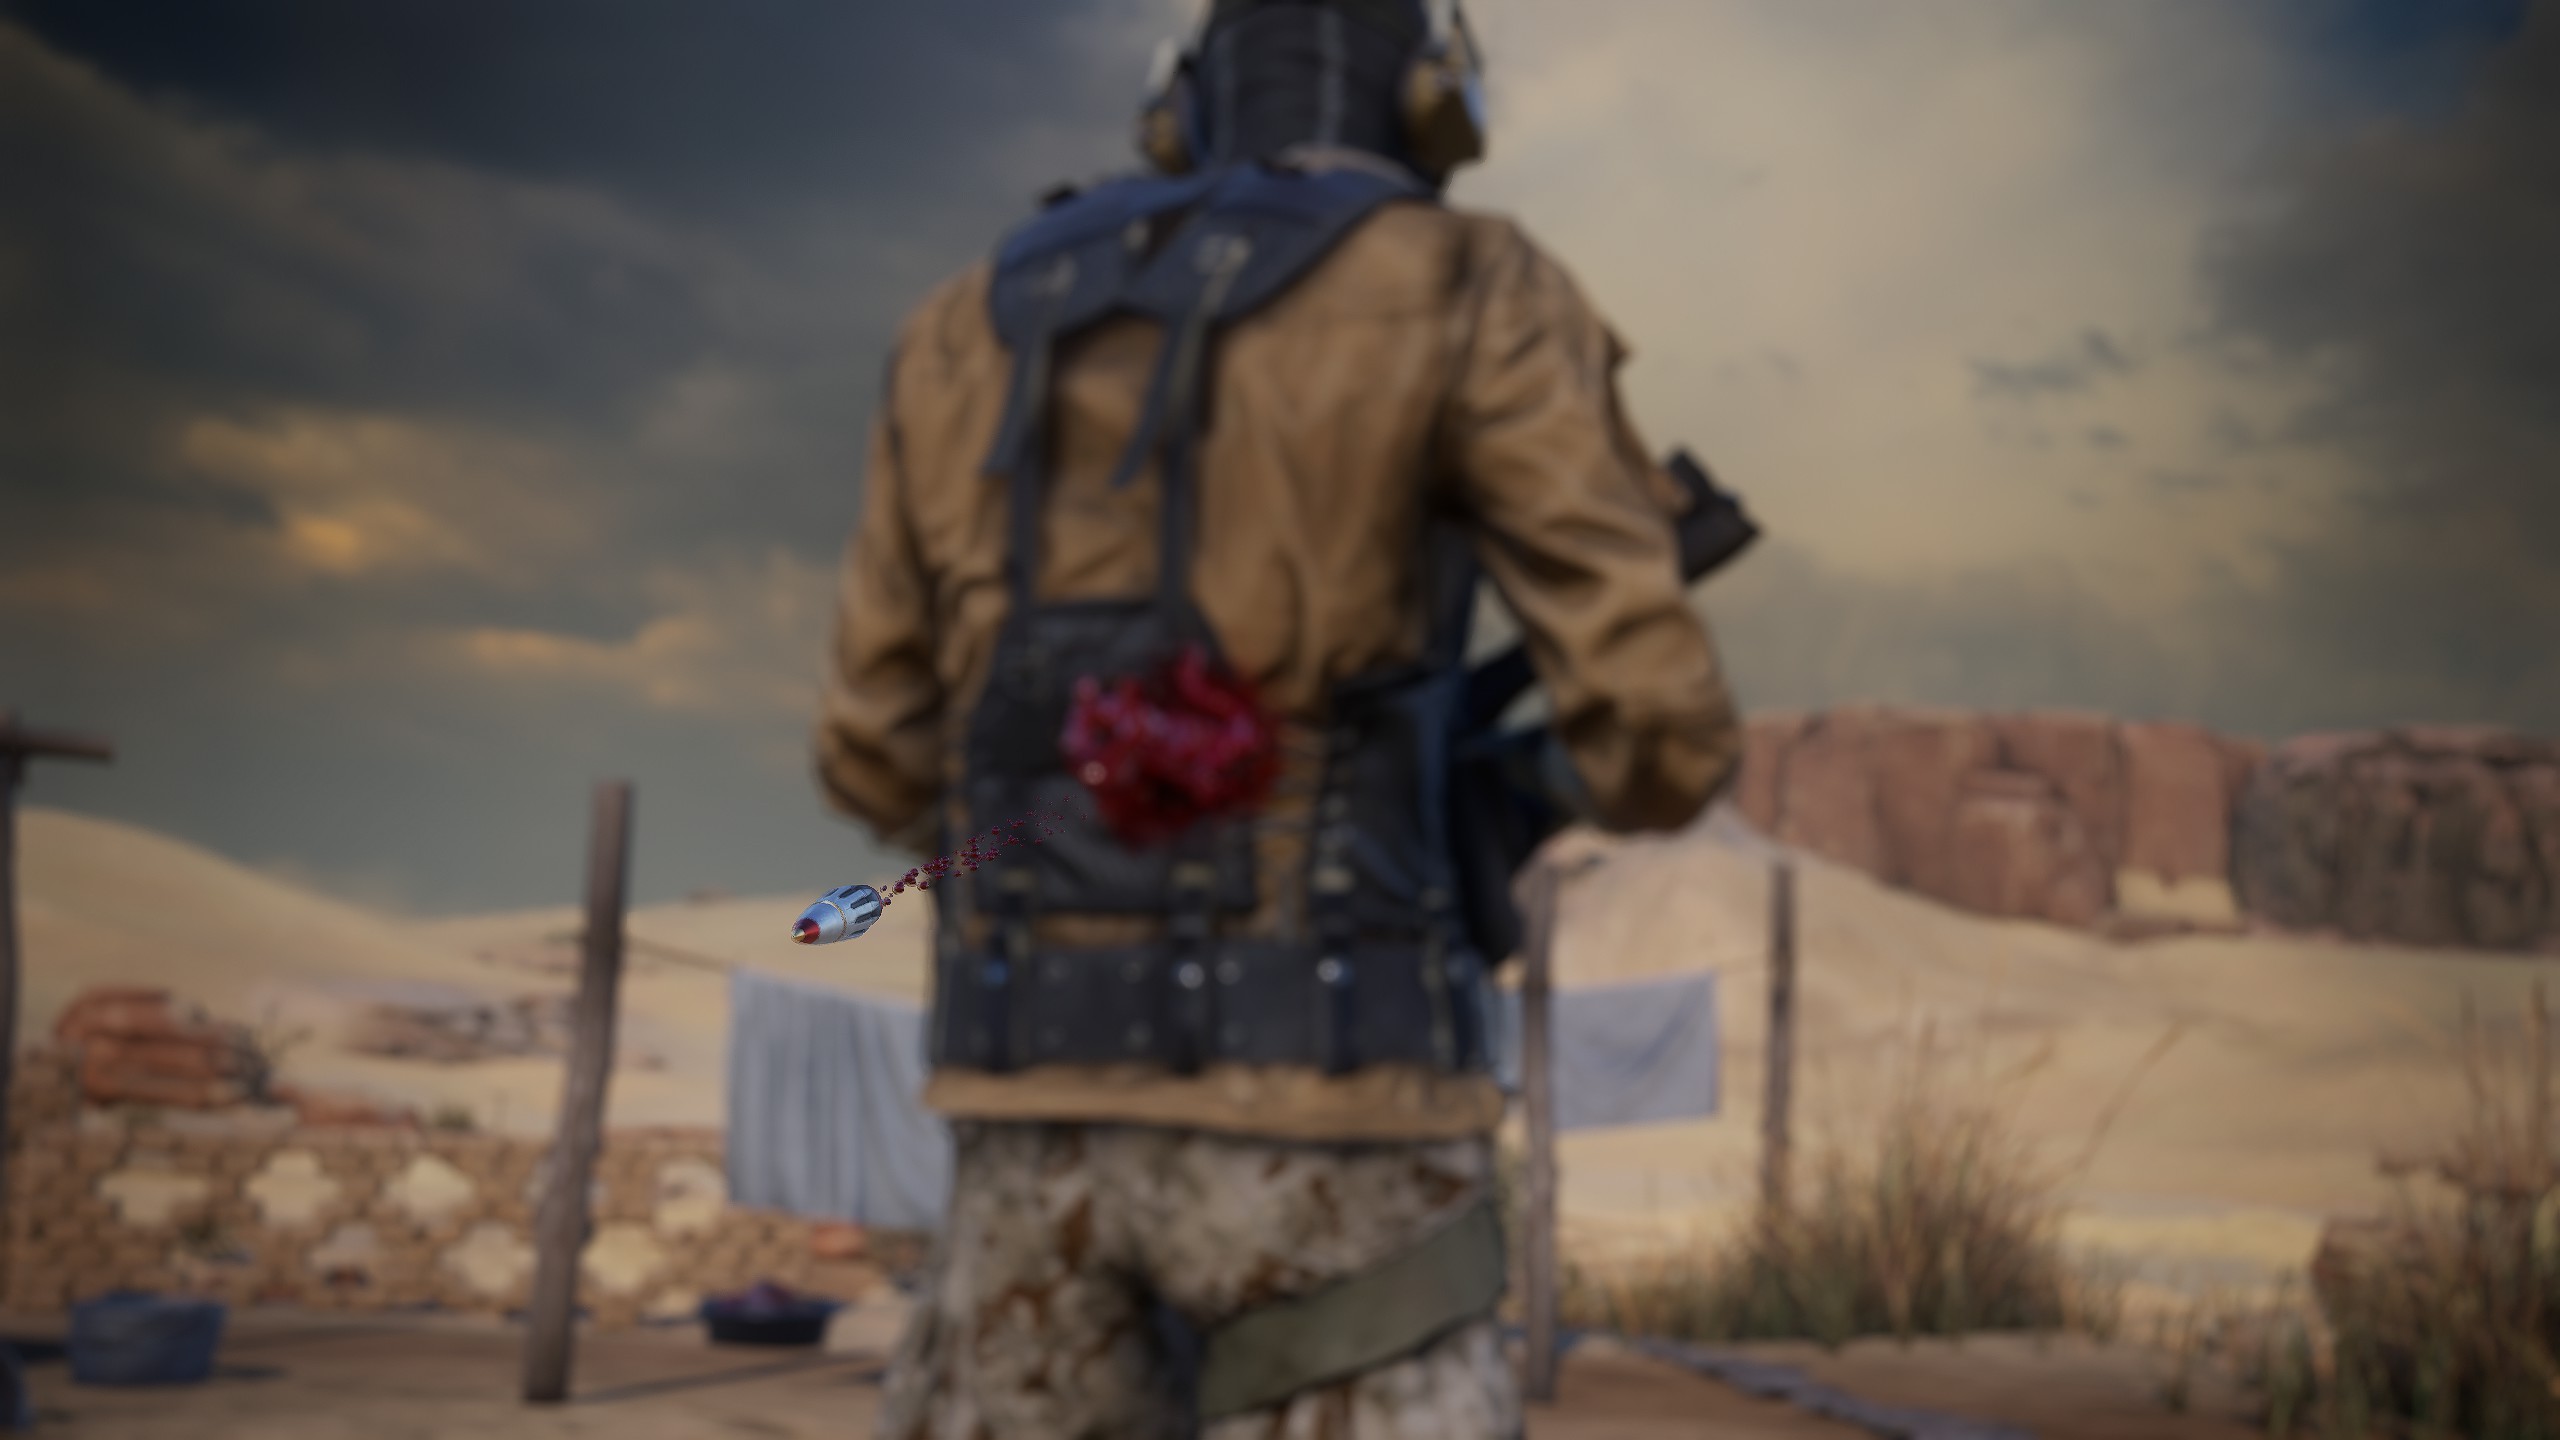
First, if you take nothing else away from this, know that the damage stat isn’t a perfect indicator of effectiveness. If it were, the Defender 888 would almost always take out a target with a body shot, given it’s high damage stat (read my review of the Defender 888 here).
With that out of the way, let’s talk in a little more detail, with a caveat: I have limited means to do detailed tests in SGW Contracts 2 compared to other games, but I believe I’ve nailed down some important aspects to ballistics here to help you be more informed beyond what the game tells you itself. All testing was done at Sniper Veteran difficulty, just to simplify things and provide a nice average.
First off, believe it or not, ballistic armor and its effectiveness is modelled beyond just the differences between standard foes and heavies. Actually, I should note that the different harnesses enemies wear appear to play a role: It’s difficult to tell, but enemies wearing a molle harness as opposed to the zippered vest seem to gain additional protection as if they were wearing a plate carrier.
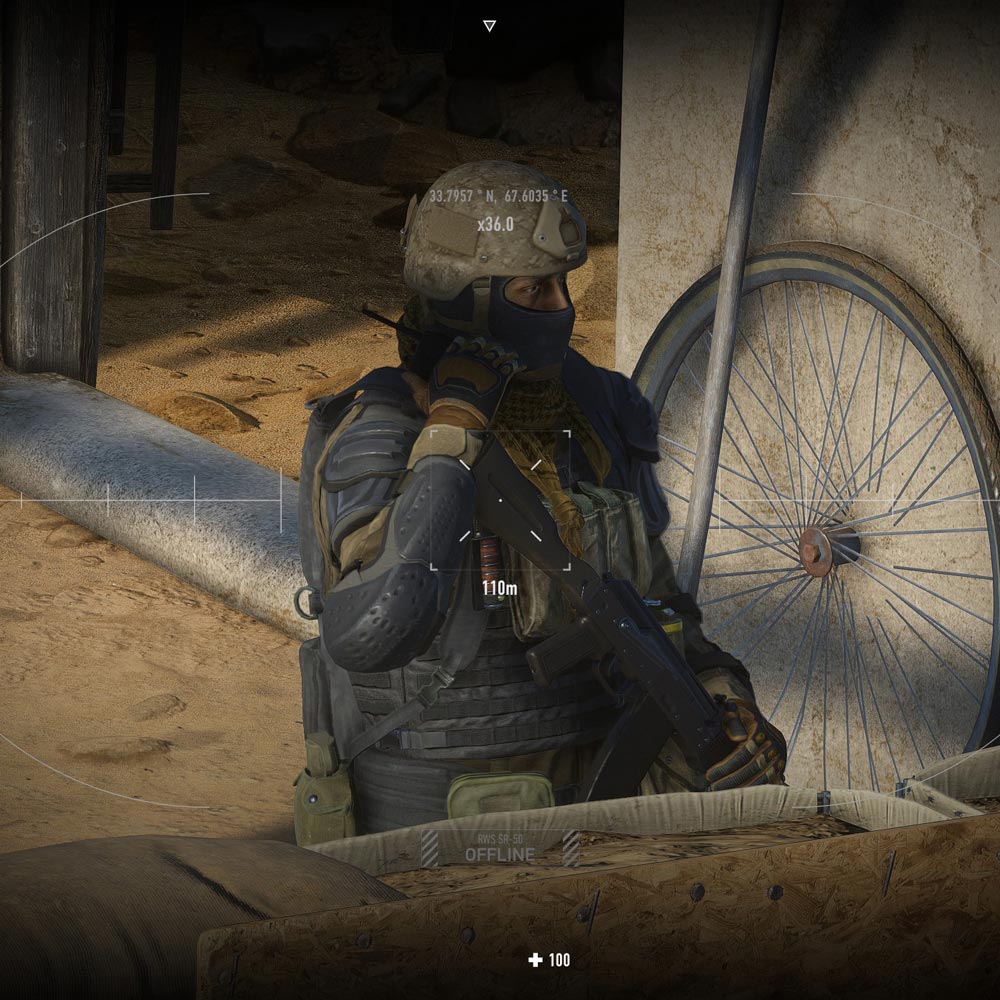
Non-armored target identification


In the screenshots above you can see the zipper-style harness; this offers zero protection against rounds, meaning as long as the damage is high enough (for weapons such as the MSSR 10), a body shot will take them out. Additional testing still needs to be performed, such as if it’s related to light vs. medium sniper rifles, but in general I believe you’ll need at least a medium sniper rifle to take one of these foes down with just a single body shot. In testing, the LSSR MYSH 2 took 2 shots to take the aforementioned target down, which is on the lower-end of the damage spectrum, and is a light rifle.
Moderately-armored target identification
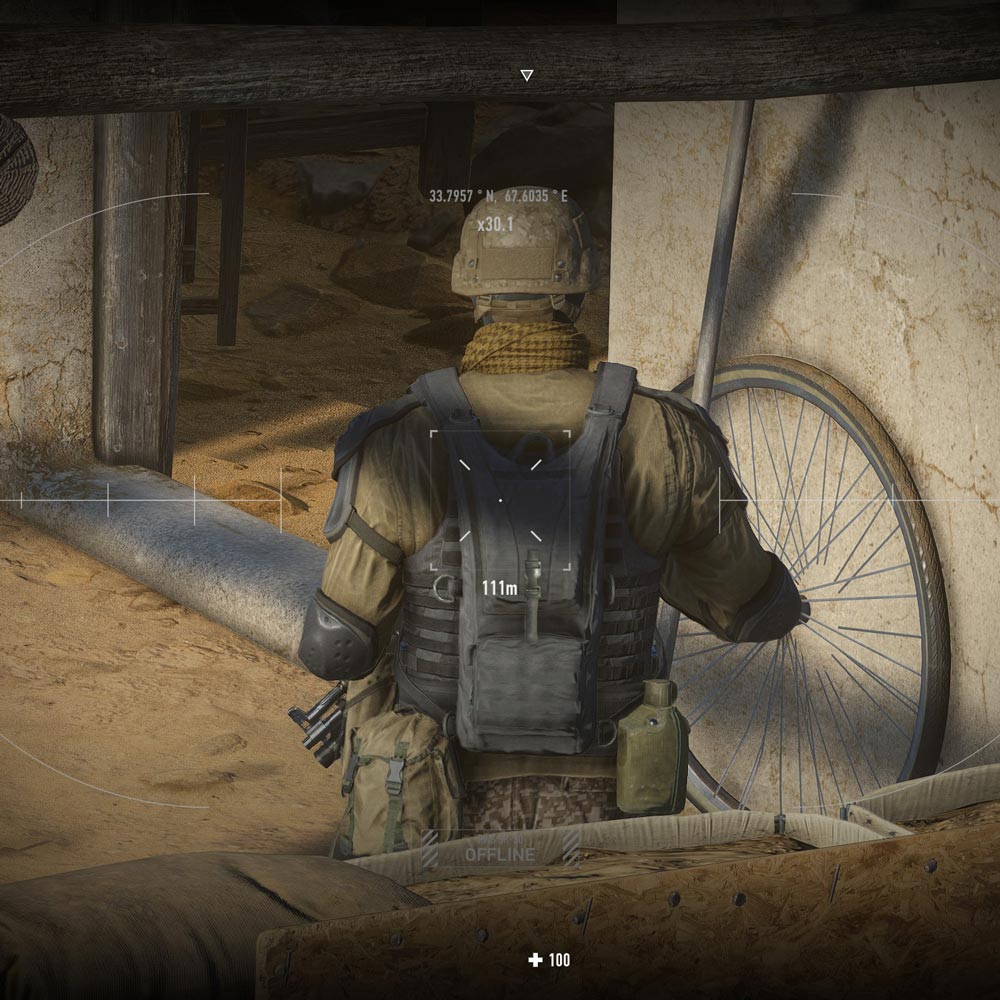
Moderately-armored foes, such as those pictured above, wear what appears to be a molle harness with presumably an armor plate in the front & back. These targets can take a shot from a Defender 888 without going down; You’ll need to put a second round down-range to effectively eliminate them. If you’re utilizing a heavy rifle, however, this type of target will drop with one shot pretty much anywhere in the body.
So, when choosing to take a target down, you may be lucky in that, as long as you’re carrying a medium rifle, you’ll be able to drop the target with a single shot as long as they are in a zippered vest style harness.
Of course, when utilizing AP rounds, this is a non-issue: AP rounds will always take a target down in 1 shot. It should also be noted: Disabling bullet cam can mean double & triple kills won’t work! For whatever reason, I have only been able to consistently get double & triple kills (using AP rounds) with bullet cam enabled. This may be patched in a later release, however.
Speaking of ballistics.. What about bullet travel time and drop?
Bullet speed and drop in SGW Contracts 2
First off: All sniper rifles feature the same amount of bullet drop regardless of caliber or barrel length. This was most likely done to simplify development, and is less of an issue given that we’re utilizing a magical bullet drop compensator (BDC) reticle instead of something with MIL/MOA dots. The only way you’re going to be dealing with less actual bullet drop is if you utilize an A.G.I.L.E. round (previously called a DARPA round in the older games of the series), which ignores wind and gravity entirely no matter the range.
The only major factor you have to consider when it comes to bullet drop is ensuring you’re using an extreme range scope; this optic allows you to zero out to 1500m no matter the rifle. Anything beyond 1500m and you’ll have to manually elevate and utilize the reticle to help you compensate for the difference.
However, bullet speed is consistent aside from one rifle: The HOG-30A2.
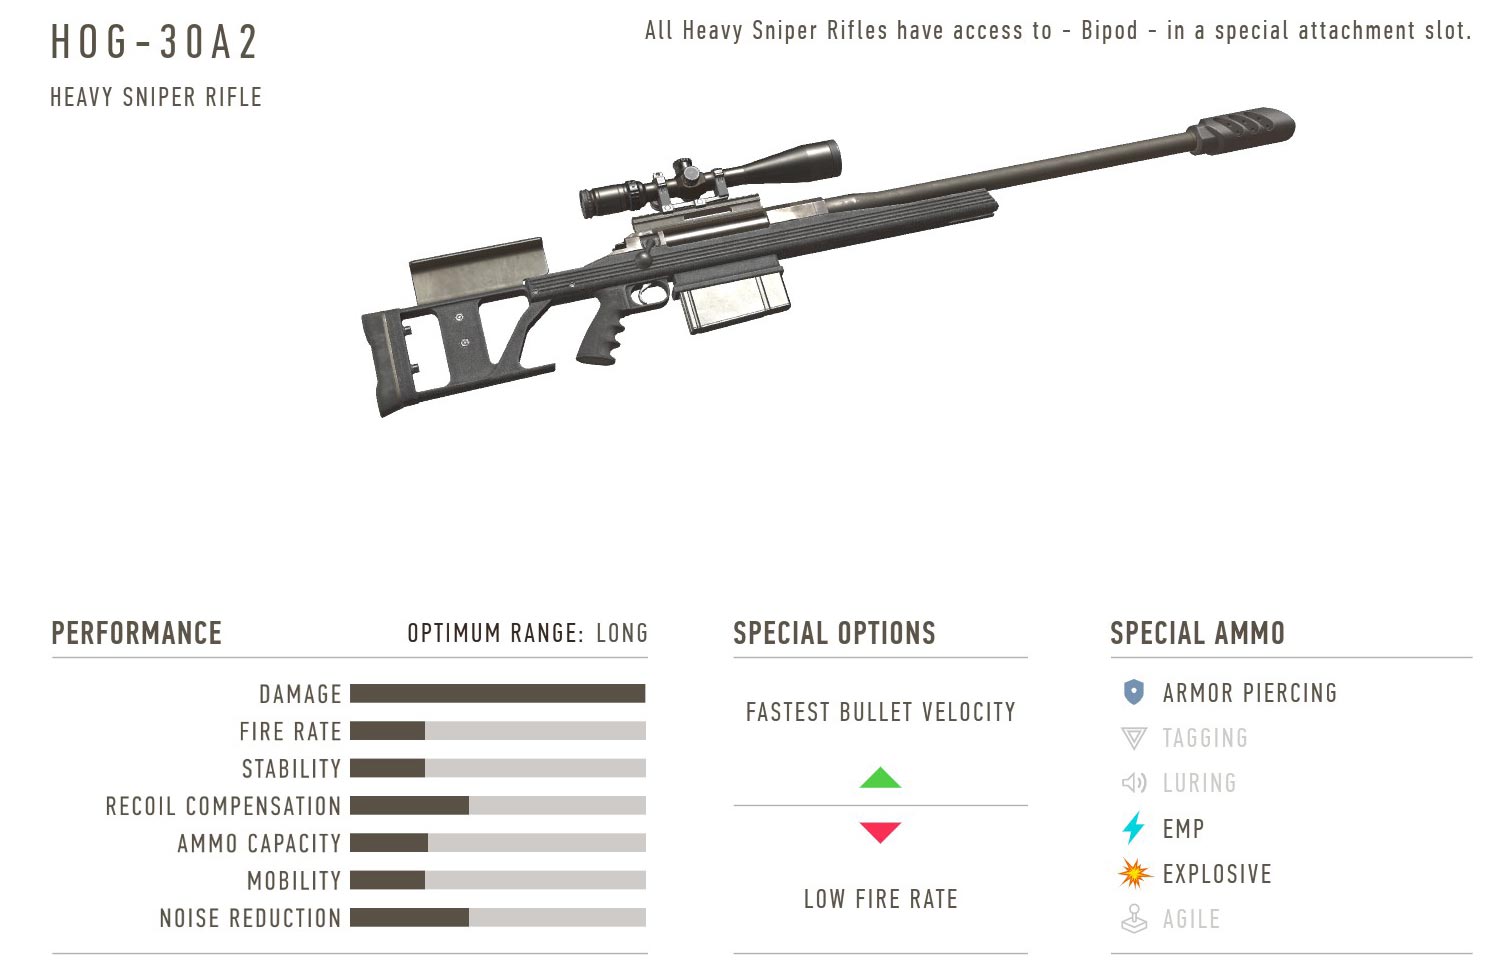
The HOG-30A2 is the only rifle that features a “fastest bullet velocity” bonus, and it is in fact that only rifle with a casually-measurable boost in velocity (a full review of this rifle will come later).
That means that you have to lead moving targets much less, and if you’re attempting to blow up a barrel right as a vehicle drives by, you’ll need to account for the faster travel time. It’s by no means a massive increase, but it can simplify those quick reaction shots when a target is moving at-range.
Not a game-changer, but an interesting choice to be included in paid DLC as opposed to into the base game.
What do the rest of the stats mean in SGW Contracts 2?
Finally, let’s close out with a quick breakdown of all the stats and what they actually mean (and whether they can be trusted, or are even useful).
Damage is obvious, but be sure to note above that round penetration can vary depending on the target, and only heavy rifles will consistently drop a non-heavily-armored foe with a single shot to the body. When comparing the damage stat, I suggest you compare it to other rifles in the same class (Light to Light, Medium to Medium, Heavy to Heavy).
Fire rate is simply how fast you can pull the trigger. Most rifles in this game are bolt-action, meaning you have to cycle the bolt back with each shot yourself. Others, such as some DLC rifles and the LSSR Mysh 2, are semi-automatic, so you don’t have to wait for the bolt to cycle to shoot another round. If you frequently miss shots, consider choosing a rifle with a high rate of fire.
Stability refers to how much wobble the rifle has when aiming down the sites and not holding your breath. The lower the stability, the more the scope will wave around. If you’re an impatient shooter, high stability is going to be your friend.
Recoil compensation refers to how much the rifle (and scope) will fly off target with a shot. The higher the bar, the less recoil you have to deal with, meaning you’ll easily be able to see if you landed your shot and need to take a follow-up. As long as you’re patient, this is less important in most cases.
Ammo capacity simply refers to how many rounds you can carry. Unless you plan on missing a lot of shots, or just trying to complete a challenge where you only use a sniper rifle, this can be ignored; you’ll be collecting plenty of rounds from your foes and ammo boxes in the area.
Mobility is an interesting weapon stat; it refers to how fast you can move while you’ve got the rifle in your hands. The higher the mobility, the faster you move. Weapons like the LSSR Mysh 2 allow you to move at a good clip compared to some heavy rifles, but honestly, unless you’re carrying a light rifle with a canted secondary sight, you should always have your rifle stowed and your secondary/pistol out when moving around the map.
Finally, noise reduction simply refers to how loud your rifle is. This stat is a little confusing, however: Weapons like the MSSR 10 can be fired exceptionally close while staying undetected, while you’ll need to be 3x the distance with the Defender 888 in order to stay undetected. Heavy rifles you’ll need to be, at a minimum, 1km+ away from a target (although the RON B107, after preliminary testing, may be detectable at just beyond that range).
Don’t forget to check out the other SGW Contracts 2 guides and rifle reviews! I’ll continue to add more, including updating this specific guide, as more information becomes available.